Pages

Friday, January 24, 2014

A Review of Everything So Far

Okay it's a new year & I've been away for a while. Happy 2014! I hope this is the year that all of your dreams come true... and that includes learning how to play guitar. Let's have a review of everything we covered last year.

We learned all of the natural notes across all six strings in the open position. What does that mean? Well, it means that we learned all the notes, without any sharps & flats, that you can reach from the open strings without stretching beyond the first 3 frets. Here's a diagram of these 17 notes:


Remember when you look at diagrams like this one, the open strings are to the left & big E string is at the bottom. Anyway, there they are. Play through them, started with the lowest note - E - and going up to the highest - G. Use your 1st finger for the 1st fret, your 2nd finger for the 2nd fret & your 3rd finger for the 3rd fret. The notation for this exercise looks like this:


We'll play these notes in some more exercises in the next lesson. What chords did we learn last year? We learned the following major chords: C, A, G, E & D. And the following minor chords: Am, Em & Dm. Here is a chart of the chords we learned:


You should be able to play all 8 of these chords before we move on. Try playing through them all. Strum the chord first, then pick each individual string, then strum the chord again. Every note should sound clearly & distinctly. And remember, when you see an "X" on the chart above, you don't play that string.

So welcome to the new year! I'm looking forward to showing you everything you need to know to play the guitar proficiently this year. Until next time, keep practicing!

Wednesday, August 7, 2013

Putting it all together & the C major scale

Hello students! So now that we know some notes on all six strings, let's try putting them all together. Try the following exercise. It's not too difficult. From the lowest note we know up to the highest & back down again. These are referred to as the natural notes of the 1st position. And that's what we've been learning for the last 5 lessons. Natural notes are those without any sharps or flats - we'll get into sharps & flats a little later on. And the 1st position is a spot on the guitar where your fingers are lined up with the first 4 frets. So your 1st finger plays on the 1st fret, your second finger on the 2nd fret, and so on. That's called 1st position. Similarly, all the chords we've learned so far are 1st position chords. Makes sense huh? Anyway, here's the exercise:


When we play these 17 notes, what we're actually playing are the notes of the C major scale. The C major scale is the only scale with all natural notes - no sharps & no flats. That's probably why it's the first one most guitarists learn. What's a scale you may ask? A scale is just a series of notes. And there are lots of them! Each note basically has its own scale. That's where chords come from. So when someone tries to corner you with "Which came first? The scale or the chord?", you can say with confidence that scales came first.

Why is that? Well, the first musical instruments that could play any kind of tone were flute-like things carved from rock or bone. They could only play a few notes & probably just one at a time. So it seems pretty likely that scales came before chords. And chords are made up of notes from their respective scales anyway (which is why it is so important that we learn scales). So scales almost certainly had to have come first.

Now for the C major scale. As we learned in the last lesson, one octave of the C major scale is buried within the 17 notes we have become familiar with. Going from C at the 3rd fret of the 5th string up to C at the 1st fret of the 2nd string is one octave. Here's the notation again. This is what a scale looks like on the staff. Play through it again, paying particular attention to the notes on the staff as they rise & fall.


Notice that C is located one line below the staff & again on the 3rd space of the staff. That's because C occurs twice in the scale pattern. You start on C & end up on C again. Makes sense, doesn't it? We're playing a C and then reaching a second C at the top or bottom of the scale, depending on which way you're going. The notes in the first part of the exercise are C, D, E, F, G, A, B, C, B, A, G, F, E, D & C and in the second part it's the same pattern, just backwards. Here's a neck diagram that shows where the notes we're playing occur on the guitar:


What we're actually looking at here is all 17 of the notes we've learned so far. I've colored C red in this diagram, so you can understand specifically where these notes are. All you're playing in the exercise above is from one red C to the next & back again. As you might have noticed, the C major scale is surrounded by other notes not included in the exercise. Practice playing this diagram using one finger per fret, so that your 1st finger is always on the 1st fret, your 2nd finger on the 2nd fret, etc. We don't use our pinky finger at all in this pattern.

Start with the lowest note, the open 6th string, which is at the bottom of the diagram. Then play all the notes, one at a time all the way through the 1st string & back again. It's the same as the first exercise in this lesson, isn't it? So this is yet another way of indicating musical notes on a guitar, besides the treble clef staff & tablature notation. I hope it helps you to understand what we've learned so far.

Instead of chord practice this time, let's learn a song using the C scale. Now that we know all the notes, we can start playing melodies. It's just that simple! So have a go at my arrangement of Twinkle Twinkle Little Star. Take it slow & build your speed up as you practice.


It should sound just like you remember it, as you play through it. If it doesn't, then you're playing something wrong. Look carefully at the notation & don't be afraid to sing or hum along as you play. In no time at all, you will play it fluidly & then you can amaze your friends with "Hey I learned a song!". And that is why we're all here to begin with! Right? And until next time, keep on rocking...

Saturday, August 3, 2013

Notes of the 5th & 6th Strings

So now we know notes across 4 strings of the guitar. Now it's time to learn notes on the last 2 strings. On the 5th string, A is the open note, B is at the 2nd fret & C is at the 3rd fret. On the 6th string, E is the open note, with F at the 1st fret & G at the 3rd fret. Just like the first string. Here is an exercise using the 5th & 6th strings:


This is a fun exercise. Or to me it is anyway. I arranged this so that the patterns sound similar to some familiar melodies. And now that we know 17 notes across all six strings, we can play some melodies that we know. So let's go over the notes we've learned. From the 6th string to the 1st, we have E, F G, A, B, C, D, E, F, G, A, B, C, D, E, F & G. Notice how they repeat over & over. E comes up 3 times. Every time it repeats is called an octave, because it occurs 8 notes above the last one (or 8 notes below, depending on which way you're going). We have a number of octaves in the 17 notes we've learned so far. See if you can spot them all. Here's a hint: F also comes up 3 times. So that's a low F, at the 1st fret of the 6th string, plus 2 more at one octave intervals.

The main thing we now know is the C scale. Embedded within these 17 notes is the sequence C, D, E, F, G, A, B,& C. That's the C major scale. In the next lesson, we'll be practicing the C scale. You're welcome to go ahead & try it. Just play all the notes you know from the 3rd fret of the 5th string up to the 1st fret of the 2nd string. And there it is. The C major scale. Isn't that cool? Here's what the notation looks like:


And let's learn a new chord: F major. It's the first of the barre chords we will learn. They're called barre chords because you make a "bar" with your first finger. Just lay the flat side of your first finger across all 6 strings at the 1st fret. Now try to sound all the notes. It's hard to do, isn't it? Don't worry. It'll get a lot easier as time goes along. Now for the F major chord:

Notice that the #1 shows up on three different strings. That's because we're barring with the 1st finger at the 1st fret. Strum the F major chord. Keep strumming until you can sound all 6 notes. Try switching from F major to C major & G major. You'll build up strength in your hand by doing this.

F is a very popular chord among songwriters. It's a comfortable key for many singers to sing in. Listen to "The Joker" by the Steve Miller Band. Or "Losing My Religion" by REM. Both of those songs start on F major. Neat huh?

Next time we'll work on the C major scale & play some chord patterns with F major. Rock on!

Tuesday, July 30, 2013

Notes of the 3rd & 4th Strings

Now that we have a little better understanding of the notes on the staff, let's move on to learning some notes on the 3rd & 4th strings of the guitar. I combined these two strings because, for the time being, there are only two notes that we're concerned with on the 3rd string: G & A. G is the note of the open third string & A is the note at the 2nd fret of the 3rd string. But two notes isn't much of a lesson. The notes of the 4th string are D, E & F. And we know that D is the note of the open 4th string. E is the note at the 2nd fret & F is the note at the 3rd fret. So we're playing the open 3rd string & then the 2nd fret, as well as the open 4th string & the notes at the 2nd & 3rd frets. Here's an exercise for you to try:


I love these five notes. They have such a melancholy air about them. I could play them over & over again. And I do quite often. You should too! Once you've become proficient at playing the exercise, try to increase your speed. But be sure to pick every note! No cheating with pull-offs or hammer-ons! Those will come later. For the moment, it will only help you to pick every note. Up-down-up-down. Do the same when strumming chords.

And say, do you realize how many chords you know already? You've learned C, A, G, E & D as well as Am, Dm & Em. With eight chords at your disposal, you could be writing hit songs right now! Let's put some of these chords together & see what we can come up with. Try these chord progressions:


Notice that the tablature has changed. You know how to play these chords, so you don't need the tab. The slashes simply mark the beat where the chords are played. Play through each exercise slowly. They're all in 4/4 time. But there are a lot of eighth notes & rests. So count to yourself "1 and 2 and 3 and 4 and" as you play. Look at the rests. They tell you where not to play.

For example, in study #1, you don't play on beat 2 or beat 4 in the 1st measure. Those are quarter note rests. So they each get 1 beat of silence. And the same is true of the 3rd measure. Similarly, the 2nd & 4th measures both play the same syncopated pattern. The D chord is played on the "and" after beat 2. The rest before it is an eighth note rest. It gets half a beat, which happens only when the beat hits "2" in our counting pattern. Then you play on "and". After beat 4, you rest on "and" before starting the next measure. It's a repeating pattern. So every other measure copies itself in an alternating sequence. See? Pretty cool sounding huh?

All three exercises are loosely based on the verse patterns from actual songs. See if you can figure out the title of each. Don't get discouraged. Play slowly & if that isn't slow enough, then slow it down some more. The beats per minute, shown as a number after the 1/4 note "=" above the 1st measure, are there to give you a guideline as to the tempo. But you don't have to start there of course. Play as slowly as you like. No one is watching you rehearse yet, most likely. And the important thing is to get the pattern right. Not how fast you can play it! Speed will come soon enough, I promise you.

The next two exercises should be played in the same slow, counting-while-playing fashion. Watch the rests! And pay attention to what is happening around the 2nd & 4th beats. That usually where the action is in popular music. You'll be rocking through all three of them in no time! And I'll be back soon with some notes on the 5th & 6th strings and even more chord progressions. Rock on!

Wednesday, July 24, 2013

The Treble Clef Staff: A Primer

Before we get into the next lesson, it has occurred to me that we need to look more closely at the staff for a moment. The 2 previous lessons can be played using only the tab notation provided below the staff. However, for those of you wishing to learn how to read standard musical notation (which I highly recommend!), the use of tab notation merely delays your education.


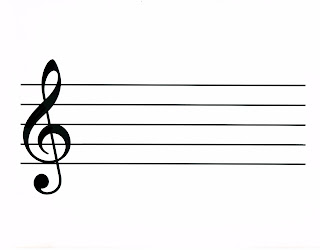
Look again at the treble clef staff. Notice that it has 5 horizontal lines & 4 spaces. A notes can be written either on a line or in a space. And each line or space refers to a particular note. Everything that you need to know to play a piece of music happens with this image.

There are 7 natural notes in western music - A, B, C, D, E, F & G. And they all fall on the staff pictured above, with lower pitched notes occurring lower on the staff & higher pitched notes occurring higher on the staff. Here are the notes of the treble clef staff:


The notes on the lines of the staff are E, G, B, D & F. You can remember them easily using this simple sentence: Every Good Boy Does Fine. The notes that fall within the spaces are F, A, C &E. They can be remembered easily too. They simply spell out FACE.

So knowing only what you know just from these 2 graphics, you can already say that E on the bottom line is a lower note than F in the first space & D on the 4th line is a higher note than A in the second space. And you can say this without having any idea what these notes really sound like. It's just how things are on the staff.

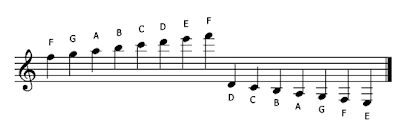
Now you might be saying to yourself: "Hey wait a second! There must be more than just 7 notes in music." And you would be right. The staff continues above & below the image above, using what we call ledger lines to represent notes above or below the treble clef staff. Here is an example of ledger lines:


See how they continue above & below the staff? So far, every note we've played has been found on the staff. But a time will come very soon when we will have to escape the staff & use some ledger lines to play through our lessons. But that's still a lesson or two away, so don't worry about it too much yet.

Where do the notes of a guitar fall on the staff? Here is an example using only the open six strings:


Notice in the first 2 measures that the open 6th string & the open 5th string have ledger lines. Those 2 notes are represented below the staff  due to their low pitch. But since we've only played notes on the 1st & 2nd strings, we haven't made use of ledger lines yet. The six notes we've learned have all been on the staff. Here's what they look like together:


Try playing through this exercise. Notice the funny squiggle at the end of the 3rd measure & again at the end of the 6th. It's called a "rest". A rest means you don't play on that beat. Read the notes on the staff as you play, even if you're primarily using the tab notation. The notes are B, C, D, E, F, G, F, E, D, C & B (rest) followed by G, F, E, D, C, B, C, D, E F & G (rest). Simple isn't it? Work on playing through this exercise cleanly & using an up/down picking motion. Then, when you feel confident enough, try increasing your speed. And we'll learn about the 3rd & 4th strings in the next lesson. Rock on!

Tuesday, July 16, 2013

The 2nd string & the first minor chords

Okay now that you've learned some notes on the 1st string, it's time to move over to the 2nd string. The notes you learned last time were E, F & G. In this lesson, we will learn B, C & D. The open 2nd string sounds the note "B". The note played at the 1st fret of the 2nd string is "C". And the note played at the 3rd fret of the 2nd string is "D". Just like the notes of the 1st string, we're only playing the open string, the 1st fret & the 2nd fret. Simple huh?

So let's try out these new notes on the 2nd string. Here's an exercise for you to practice:


It's basically the same exercise as the last one, only it's on the 2nd string instead of the 1st. Now try playing the notes on the 2nd string followed by the notes you learned on the 1st string & back again. Here's how it looks in notation:


So now you know B, C, D, E, F & G. They even sound like a scale when played one after the other, don't they? That's because they're all part of the C scale. In the next lesson, we'll put these notes together in a song & learn some notes on the 3rd string. But for now, let's learn some more chords!

So far, you've learned the open chords C, A, G, E & D. Every one of them is a major chord. But many songs aren't just made up of major chords - although some are. There are also minor chords. Minor chords are the sad, sombre chords you hear in music. So let's learn some of them!


This is the A minor chord - often written like this: "Am". Try playing the A Major chord followed by this one. Can you hear the melancholy flavor of A minor? A Major is a happy sounding chord by comparison. Weird isn't it? And all that from changing only 1 note. The note on the 2nd string is flatted by 1 fret, or by one half-step. More about steps & half-steps later. For now, strum the Am chord until it sounds smoothly & clearly. Note that the 6th string is not used, just like A Major.

The Am chord starts off some very popular tunes, just like all the other chords we've learned so far. It's the 1st chord of "Stairway To Heaven" by Led Zeppelin; and the first chord of "Glass Onion" & "Things We Said Today" by the Beatles; as is "Last Dance With Mary Jane" by Tom Petty. And thousands of others! A minor is a very popular key!


Here is the D minor chord. As with A minor, you're only moving one note from D Major to play D minor. I'll explain why it works this way in a later lesson. And notice that you only play four strings, just like D Major. So play D Major followed by D minor. Then try playing Am followed by Dm. D minor is a very sad key. Some say it's the saddest of all the keys.

Strum the D minor chord until you are proficient at it. D minor is also found at the start of many songs. "Sultans Of Swing" by Dire Straits, "Another Brick In The Wall (Part 2)" by Pink Floyd & "Paint It Black" by the Rolling Stones all start on D minor.


The last chord for this lesson is E minor. It's one of the simplest chords to play, since it only uses 2 fingers. And you play all 6 strings. Some songs that start on E minor: "Welcome To The Machine"by Pink Floyd; "Turn The Page" by Bob Seger & "Riders On The Storm" by the Doors.

Try playing G, then Em, then C, then D. That's the chord progression for "Stand By Me" by Ben E. King. And it's the same progression used in "Blue Moon" by the Platters. In fact, it's commonly referred to as the "50's progression" because so many artists from that era either used it outright, or used some variation of it.

Anyway, congratulations on learning your first minor chords. You now know enough chords to play for hours on end. Keep practicing & trying different combinations. Next lesson, I'll give you some chord progressions you can really sink your teeth into. Rock on!

Sunday, June 23, 2013

The 1st string & a few more chords

Okay so you've learned a little something about rhythm & how to count. Don't get too lost in the concept of counting. We're mostly going to be counting to 4 for a while and that's about it.

So now let's look at the notes on the first string. And remember, that's the little string at the bottom of the neck. The open string plays the note E. The 1st fret is an F & the 3rd fret is a G.

We're going to start out by picking up, down & around these 3 notes. So try to play through the following piece. Watch your fingering & take your time until you have it down smoothly. It doesn't matter at this point whether all your pick strokes are downstrokes or alternating downstrokes & upstrokes. But we will begin alternating our pick strokes soon. So you're welcome to try playing this piece using a down/up/down/up picking stroke. Then you'll be ahead of the game!


This might seem kind of dull at first. But there is a method to the madness. You'll see what I mean as we learn the notes on the adjacent string & beyond. For the time being, you can be proud of the fact that you've just learned 3 notes on the C scale.

And since we're talking about the C scale, let's go ahead & learn the C major chord. Here is the C major chord grid:


C major starts out so many popular songs. It's a very popular chord! Consider "Imagine" by John Lennon, "Like A Rolling Stone" by Bob Dylan & "Don't Look Back In Anger" by Oasis just as a few. Or "The Star Spangled Banner" by Jimi Hendrix!

Strum through the C major chord a few times until you can play it smoothly & clearly. Once you have it down, you can move on to the next chord we will learn today: the G major chord.


G major, like C major, is an extremely popular chord. It starts off & forms the basis for thousands of songs! Consider "Night Moves" by Bob Seger, "Pink Houses" by John Cougar Mellencamp & "Under The Boardwalk" by the Drifters.

The C major & G major chords almost make a tune by themselves. They go together quite well! And there's a good reason for that. You'll learn why when we start talking about music theory. For the time being, just strum the C major chord followed by the G major chord & back again.

And congratulations! You've learned all the first position open major chords. These are the CAGED chords, like we talked about in the first chord lesson. C-A-G-E-D! Play them all, one after the other. They don't sound like they go together do they? But they do!

Play C major, then G major, then D major, then A major & finally E major. Recognize that progression? It's "Hey Joe" by Jimi Hendrix. Bet you didn't think you'd be learning any Hendrix this soon, did you? Now you can impress all your friends! And here's the sheet music to practice with:


I hope you enjoyed this lesson. Next time, we'll learn some notes on the 2nd string & put them together with the notes we just learned on the 1st string. Plus we'll learn a few more chords. Until then, rock the house!